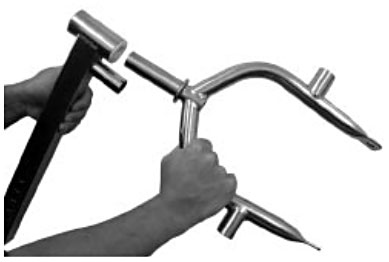
Thank you for purchasing your new Slider Stainless Steel Buggy. If operated and looked after properly, your new buggy will serve you well. Please make sure you have all the SLIDER BUGGY PARTS before you start the assembly. PLEASE NOTE: Make sure you use an anti-seize compound such as Copaslip or equivalent on the stainless steel bolts and nuts. If you do not use this, the bolts will gall and seize!
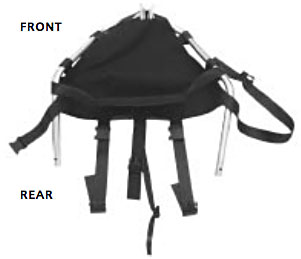
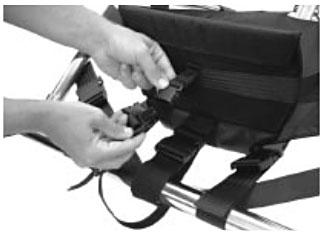
FITTING THE SPLASH GUARD:This buggy comes with a splash guard. This is designed to deflect most water and dirt while buggying. However, it is still advisable to wear protective clothing when buggying in wet conditions. Please follow the simple instructions below.
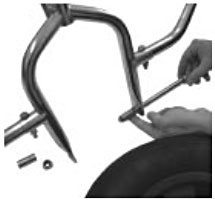
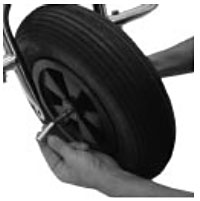
CARE AND MAINTENANCE: Taking good care of your buggy will ensure it has a long and trouble free life. We suggest that you take note of the following maintenance tips: FRAME: The frame is made of durable stainless steel and is virtually maintenance free. However, if your buggy is muddy or has been used on the beach in salt water conditions, we recommend that you hose it down thoroughly with fresh water at the end of the day. Inspect the frame for damage and cracks periodically. Do not attempt to repair frame damage yourself, contact TrikeBuggy for advice. SEAT: The seat can be hosed down at the end of the day. If it is very dirty, you can hand wash it in warm water using a non-bleaching detergent. Allow it to completely dry naturally, before packing it away. Check the seat for wear periodically. Repair any damage prior to next use. WHEELS AND BEARINGS: Wheels and bearings will, due to their nature, wear with use. Periodically remove the wheels from the buggy for maintenance. The rear axle bolts are made from hi-tensile steel (not stainless). This is because stainless steel bolts, when screwed into the stainless steel frame, can “lock up” making them unremovable. Periodically clean the rear axle bolts to prolong life. Hose the wheels down with fresh water and dry them thoroughly. When completely dry, spray all bearings lightly with a Teflon based lubricant (most bicycle or motorcycle chain sprays are suitable). Check the plastic hub for damage and cracks. Replace the hub if damage is found. Hubs cannot be repaired. Correct replacements can be obtained from your dealer. Check the tires for damage and wear. Replace worn and damaged tires with new ones of the correct size and type. Correct replacements can be obtained from your dealer. Bearings should be replaced with new ones when they become worn. Wear can be detected by spinning the wheel on the front axle bolt while holding the axle in both hands. If the wheel is reluctant to spin freely (after lubrication) or has a lot of sideways movement, replace the bearings. Check all wheels.
|
|
|---|
|
DISCLAIMER: Please read and be sure you thoroughly understand this disclaimer before flying a TrikeBuggy. Trike flying is an extremely demanding sport requiring exceptional levels of attention, judgment, maturity and self discipline. It is unlikely that you will be able to participate in it safely unless you make a conscious and continual commitment to your own safety. PPG and Hang Glider Trike flying is a dangerous sport and may result in injury and death even when practiced by a competent pilot using proper equipment. TrikeBuggies are not covered by product liability insurance, nor have they been designed, manufactured or tested to any federal or state government airworthiness standards or regulations. Do not fly them unless you are willing to assume personally all risks in the sport of Trike flying, and all responsibility for any property damage, injury, or death which may result from your use of this TrikeBuggy. Safe operation of the TrikeBuggy requires a pilot proficiency equivalent to that of a BFI (Basic Flight Instructor), as well as an equivalent level of knowledge and understanding of those wind and weather conditions which may compromise the pilot's safe control of the TrikeBuggy. In particular, be advised that gusty winds or turbulent conditions may interfere with even an expert pilot's ability to safely control the TrikeBuggy, and may cause it to crash. Never take anything for granted in Trike Flying. If you are in doubt about anything, stop and figure it out or contact TrikeBuggy. Also please read our Warning and Caution! |

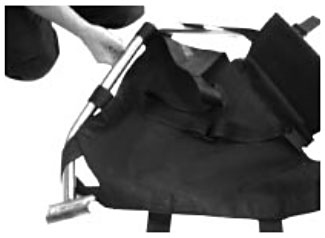
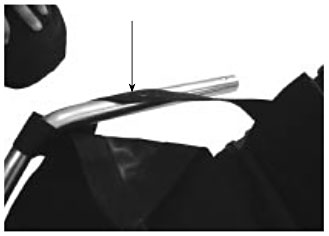
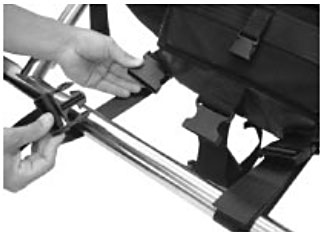
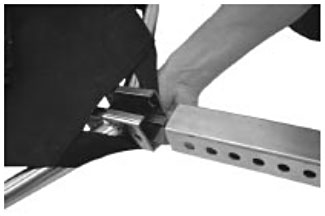
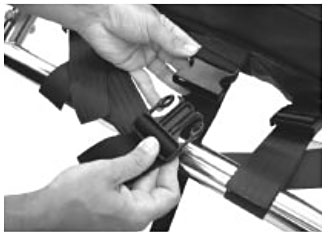


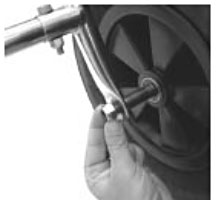
 Place hole in splash guard
over ‘steering stop’. Wrap
shorter velcro strap around
front fork.
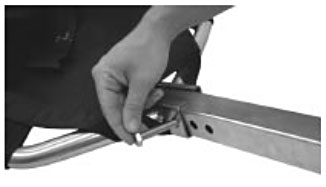
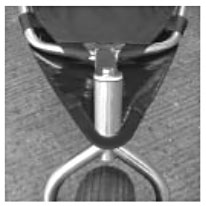
Place hole in splash guard
over ‘steering stop’. Wrap
shorter velcro strap around
front fork. 